
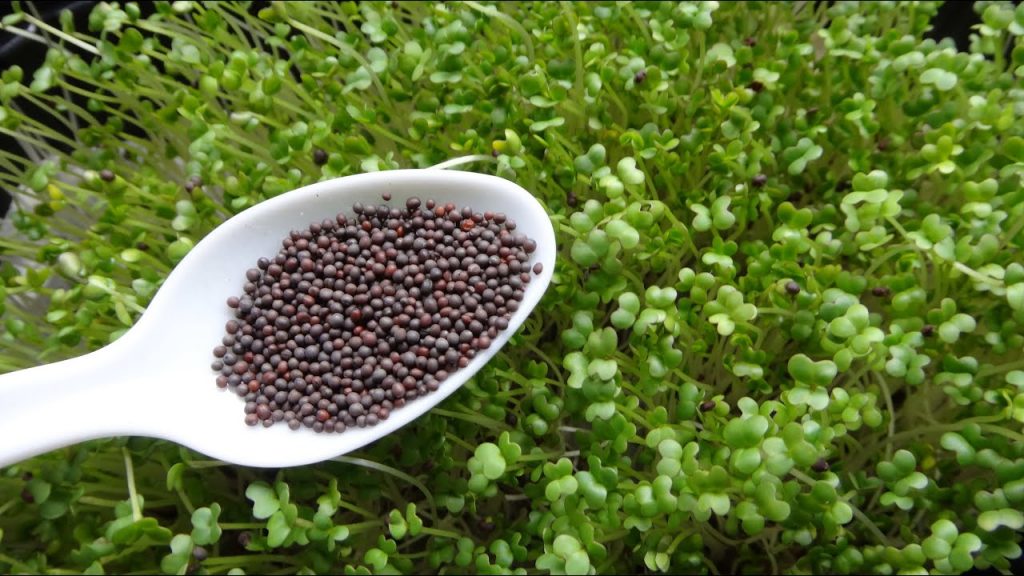
Earlier, microgreens were only used in high end restaurants and cafes, but now these days they have became mainstream. Microgreens are now used by a lot of people in cafes, small and medium restaurants, and the health conscious crowd. Everybody is loving it, as they are compact and full or flavor and color. In this article we will discuss how to find the best seeds for microgreens. But first let’s have a brief overview about what microgreens are.
Microgreens are grown from the same seeds that we use in growing herbs, vegetables of edible flowers. Hence we don’t require any new kind of seed to grow microgreens. The only difference while growing microgreens is that they are harvested before they become baby plants.
You’ll have to make a lot of choices when you start growing microgreens like which growing medium to use, which seeds to use, what type of watering schedule to practice, etc. But in my opinion one of the most significant decisions is which seeds to use. In the end it won’t matter, if you have the world’s best growing station or distribution or selling team, if your product isn’t good enough, it won’t sell.
It’s always smart to put in extra effort before hand for the selection of your seeds and which microgreens you want to grow. All your other efforts in your business will have a synergy effect on this, if your product is perfect.
Should I grow microgreens from single seeds or use a mix?
Growing Microgreens is easy; one can grow these in any small space like their backyard or can even grow them in plastic containers. If you are a beginner then it is advised to start with growing single seed at a time i.e. if you want to grow two seeds together then plant them separately in two different containers and mix them together after harvesting.
What types of microgreens seeds are there?
Microgreens are grown from same seeds from which we grow herbs, vegetables or edible flowers. The only difference is that we harvest them a little earlier in the life cycle, just before they become baby plants.
Significant factors to keep in mind before selecting your favorite microgreens
As mentioned above you can grow microgreens from any regular seeds out there. But it doesn’t mean that you’ll get the same results from seeds which are particularly sold for microgreens as compared to regular seeds. In my opinion you should only go for the seeds which are particularly sold for growing microgreens. You’ll have a overall great quality crop.
Other than this there are a few things you need to ensure before purchasing, they are listed below.
It has high germination rate
Germination rate is extremely important when selecting seeds for growing microgreens. There are many cases where the germination rate is low and it results in a loss of resources, time and money being wasted.
Just ask the supplier for the germination rate of your particular microgreens. And stay away from those who have a germination rate below 85%.
It’s from a trusted supplier
As the overall market of microgreens is growing, more and more suppliers are entering the market. It’s making the overall microgreens seeds market healthy. And at the same time, there are a lot of crappy suppliers in the market too. You just need to find out the good ones.
Here are the best three online suppliers for microgreens seeds; they have been in the market for a long time with a really good history.
It’s 100% organic
Microgreens are 100% organic, they can be grown without any pesticides or chemicals. Moreover, they can be grown even without soil, by using the hydroponic method. They can be grown in natural products like rocks or coconut coir.
It has the texture and flavor that you desire
Flavor and texture, these are only two most important factors, through which you can decide which microgreens do you want to grow.
Hence, first think about the end use of your microgreens. For e.g. if you are a chef and you want to garnish your dish, and for that you require some red colored microgreens, then you can select any of the red colored microgreens according the taste which will complement your dish. So the overall decision is dependent on the end use.
Hence, these are the factors that you need to keep in mind before selecting seeds for growing microgreens. By using this method, you’ll definitely find some seeds to start growing your first batch of microgreens.
Though, if you are just starting and totally clueless about where to start from.
Then I’ve listed down ten most popular microgreens seeds you can start growing right away.
Lettuce

Starting with lettuce, it is the easiest microgreen to grow for the beginners. The lettuce microgreen is grown hydroponically.
Start by taking and evenly spreading one ounce of seeds all over the 10×20 tray, these seeds doesn’t require any pre-soaking. Leave it covered in blackout for about 3-5 days before the germination process starts, germination generally takes 2-3 days.
Keep watering it twice a day, after which they can be kept under the light. You can harvest the same after 10-12 days when you see them changing color to light green. The height of the microgreen depends upon the time you keep them as they grow with age and care.
The color of the lettuce depends on the variety of seeds which are spread; some have good green color and other have purple and green color. Flavor & Texture of lettuce is same as the full grown lettuce and can go in any type of salad.
Kale
This is a very tasty microgreen to grow in your backyard. The process follows very easy steps, take 10×20 tray (also known as 1020) evenly spread about one ounce of seeds all over the tray, and hydroponic is the preferred media to grow these seeds.
After spreading the seeds, keep it in blackout for about 3-5days depending on the time it takes in germination, generally for these seeds germination takes about 2-3 days, once you see tiny greens popping out keep them under the light for about 8-12 days after which you can harvest them when you want.
The point to remember here is that in the whole process you need to keep them moist, make sure you water them twice a day but not too much water is required therefore prefer watering them with spray water.
Kale microgreens color may vary from purple to bright pink to green in few varieties of seeds. These have very gentle thick leaves and have very mild taste, these microgreens taste amazing when you eat them fresh, they makes a very tasty addition to your smoothies.
Spinach

These microgreens are a powerhouse of vitamins, preferably grown hydroponically these microgreen can takes a 12 day process before they are ready to harvest.
Take a 10×20 tray and spread 2 ounce of seeds evenly all over and add water to moist the same, prefer a spray bottle to water them so that you don’t over water them. Now cover the tray with another tray to make it a complete blackout for about 4-6 days, after which the germination will start you will see beautiful green leaves popping up in 2-3 days after which they are ready to be kept in sunlight.
Wait for 8-12 days after which they will be ready to be harvested.The color and texture of these is same as their grown counterpart and has strong spinach taste. Use them in salads or sandwiches and they will enhance the taste for sure.
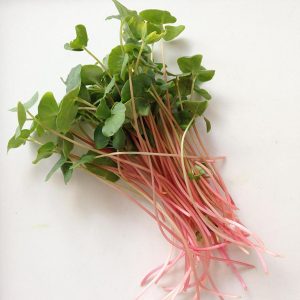
Radish
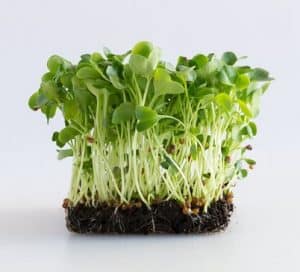
The Radish microgreen is grown hydroponically. The process takes not much of your time start by spreading about 2 ounces of seeds in a 10×20 tray, pre-soaking is not required, but you need to water them every day to keep them moist.
Keep them in blackout until you will notice small leaves popping out, the germination takes around 1-2 days. After which you can keep it in light for another 5-12 days until they are ready to harvest.
This microgreen has a strong radish flavor like its grown counterpart. It has green and red color which makes them a beautiful add on to any dish or soup.
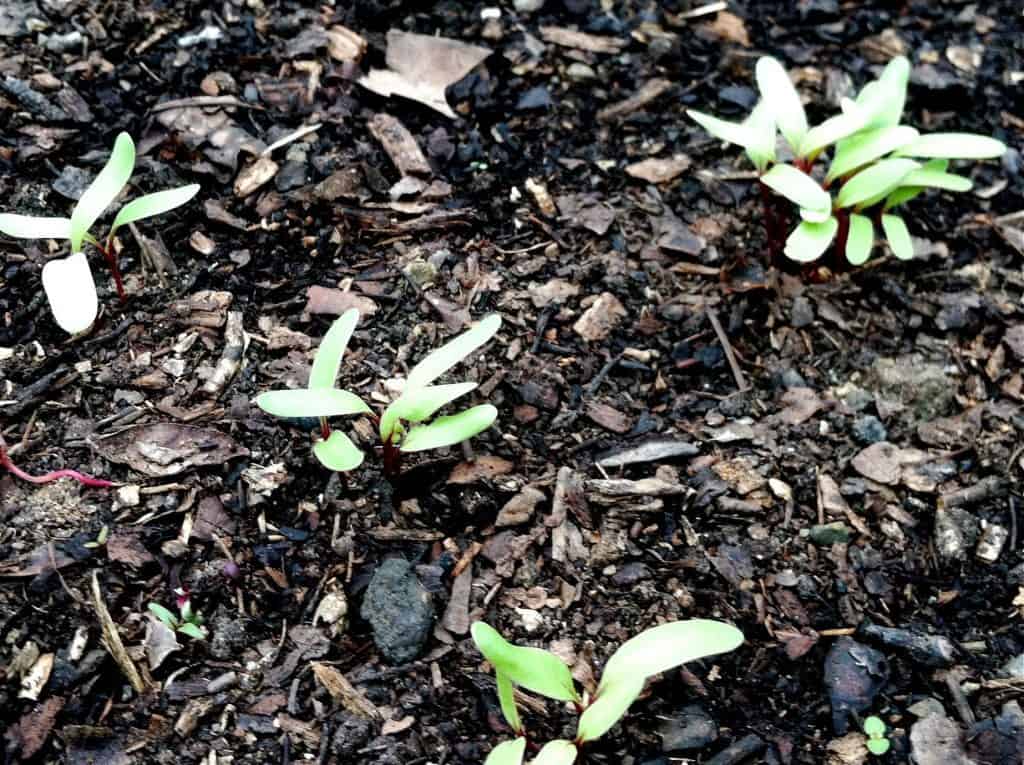
Beet
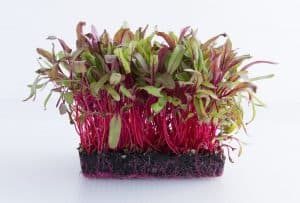
This microgreen is grown in soil, take a 10×20 tray will with some water now add soil and mix them to moist the same. Thereafter evenly spread beet seeds; take about 1 to 2 ounce of seeds which should be pre-soaked for 4-5 hours.
Now cover this tray with another tray to blackout the same for about 6-8 days. These seed takes about 3-4 days of germination time after which you they can kept in sunlight. Remember to water them regularly with spray bottle after which they will be ready to harvest in another 10-12 days.
These are very beautiful and are high on potassium and calcium, they have very earthy taste. Their leaves are of green color and has purple stem, you can enjoy them in salad or can refrigerate for later use.
Chia
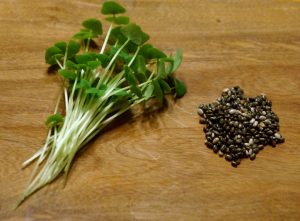
The preferred media of chia microgreen is hydroponic, take two 10×20 tray one for growing and other for covering. Now add 1 ounce of chia seeds to one of the trays and spay water after that cover the tray with another tray to make a complete blackout for about 3-5 days.
These seeds don’t require any pre-soaking. After few days you will notice leaves pop out, this is starting of germination, germination takes around 2-3 days. Keep watering them to keep it moist, now bring them in light and leave for about 8-12 more days before they are ready to be harvested.
These microgreens have green color and earthy flavor and goes very well in any garnish or sandwiches, you can also enjoy them as sprouts.
Sunflower
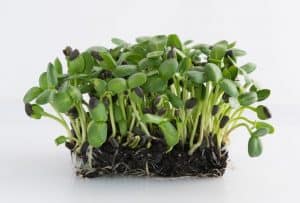
This microgreen is grown in soil, take a 10×20 tray will with some water now add soil and mix them to moist the same. Thereafter evenly spread 9 ounce of pre-soaked seeds; now cover this tray with another tray to blackout the same for about 2-3 days.
These seed stakes about 2-3 days for germination after which you they can kept in sunlight. You can harvest them after 8-12 days; remember to water them regularly with spray bottle during the whole process.
These microgreen leaves have green color and has very fresh nutty flavor and spinach like texture. The crunch of these leaves will enhance the flavor of any salad.
Buckwheat
This microgreen can be easily grown in soil or hydroponic, always remember to pre-soak the seeds for about 12-24 hours in cold water.
Take a 10×20 tray add water and soil and mix them proper so that it is properly moist after that spread the pre-soaked leaves evenly all over the tray. Cover the tray and leave for blackout of about -4 days watering them regularly, these microgreen takes about 1-2 days for germination.
Once you see the beautiful fresh leaves popping out keep it in sunlight and after 6-12 days you can harvest it as required.
This microgreen is full of fiber, has green leaves and taste like grain but is not actually a grain. It goes very well in smoothies and salad.
Amarnath
The preferred medium of amarnath microgreen is hydroponic, take 10×20 tray and now add 1 ounce and spray water. Thereafter, cover the tray with another tray to make a complete blackout for about 5-6 days.
These seeds don’t require any pre-soaking. After few days you will notice leaves pop out, this is starting of germination, germination takes around 2-3 days. Keep watering them to keep it moist, now bring them in light and leave for about 8-12 more days before they are ready to be harvested. After harvesting they can be kept for a relatively longer time.
These microgreens have vibrant red and pink color; it has a mild, earthy flavor and grassy texture. This microgreen is good in Iron.
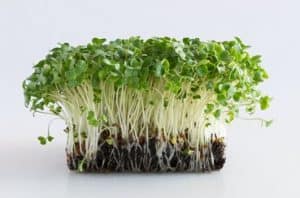
Broccoli
Take 10×20 tray evenly spread about one ounce of seeds (no pre-soaking required) all over the tray, and hydroponic is the preferred media to grow these seeds.
After spreading the seeds, keep it in blackout for about 4-5days depending on the time it takes in germination, generally for these seeds germination takes about 2-3 days, keep watering it twice a day with spray bottle. Once you see tiny greens popping out keep them under the light for about 8-12 days after which you can harvest them.
These microgreens have vibrant green color and it has robust flavors, tastes much like brassica. It goes best in freshly cooked pastas or you can give a vibrant green color touch as add on to your soup.
If growing microgreens was in your bucket list but you didn’t know how to grow them, then now you have full guide and know that it’s not at all difficult and doesn’t require any extra space. Just remember to follow main steps in the process i.e., quantity of seeds, the medium, blackout time, harvesting time and most importantly don’t forget to keep it moist.
Microgreens are not only beautiful but also has very high nutritional value and tastes good. So don’t wait, grow these microgreens and make your pastas, salads and sandwiches taste even better.
Don’t forget to share you experience with us.
I find this guide to be very helpful, This will be my first time to grow this way. I lost my garden and home to a Nor Cal fire and now live in a small room. I have been having gardening withdrawal and thought this would be worth a try. Thank you so much for being here for me..
Wow, I am so sorry to hear you were affected by the devastating fires! Take care, and let us know how your growing goes!
Really enjoyed this post, is there any way I can get an alert email when you write a fresh article?
Sure, just add us to your RSS feed.